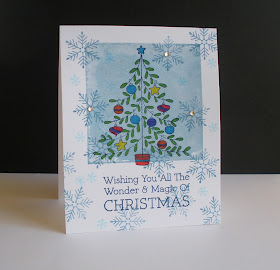
Blessings and big thanks to all of you for your wonderful response and excellent guesses. I had so much fun reading all of your responses....there were some very creative ideas, some came really close. But the truth is that I'm really a lazy stamp crafter and I like to keep things simple with a minimum of tools and steps.
So without further time wasting the secret is.........white tissue paper! When you stamp it with black ink the image shows through on the reverse. You simply stamp the image on one side, then turn the paper over, and stamp it again. A couple of you guessed that I used thin paper but then you added tracing the image with a pen. With the tissue paper there is no need to trace, the image is perfect right through the paper. The white tissue paper becomes almost translucent when it is glued down.
The closest guess came from
Sarah in Belgium. She guessed that I used thin paper, but she added that the ink would bleed through and that is the secret. Congrats to Sarah, please send me a Flickrmail with your address so I can get your prize sent out right away.
Here's a short tutorial with some handy tips for making a mirror image with tissue paper.
Supplies you will need:
Uncoated white tissue paper (the cheap stuff)
Black Dye Ink (I used Memento)
PVA glue- watered down a bit
Large, soft bristled paintbrush
Stamp positioner
Patterned Paper
Here's the card I made for the tutorial.....
Here we go.....Position and stamp the first image. Use light pressure when stamping. Carefully lift stamp without moving the tissue paper.
Move the tissue paper and clean the work surface of the ink that bled through, or.....
...use copy paper to soak up the excess ink.
Flip the tissue, reposition and stamp the second image. You can see how clearly the first image shows on the reverse.
A couple of handy tips: This is a rejected image. I used too much pressure when stamping and got a really heavy line. This one is also messy from stray ink. Be careful moving the stamped tissue paper as it doesn't take much for any leftover ink to show on the tissue. It's best to let the ink dry before handling the paper and make sure there is no ink left on the surface.
Stamp the reindeer body on patterned paper (I used Snow Day from Crate Paper) and cut out.
Stamp the reindeer body a second time on a scrap of tissue paper. Trim close.
Using light strokes and a brush saturated with the watered down glue, glue the reverse reindeer tissue to the pp scrap. Once down lightly brush any areas that pop up....then let it dry. If you work it too much it may tear.
Set aside to dry.
For the larger image it's easier to add the glue to the background paper then apply the tissue to it. Make sure to get the paper good and wet with the glue.
Add the stamped tissue to the prepared background (you only get one shot at this so line it up before you set it down). Gently smooth the tissue, there will be some wrinkling that adds to the texture and character, so try not to overwork the tissue. Just make sure that all the tissue is glued down. Set aside to dry.
Cut out the reindeer on the patterned paper, I added a spritz of Perfect Pearls to add some sparkle.
Trim the background once it dries.....then you can paper piece your reindeer and design your fabulous card!
Here's my messy work area as I work to assemble my card and get the accessories and embellishes just right.
And here's another look at the final result....
I hope you enjoyed the tutorial and that you will try this technique. Be sure to leave a comment and let me know what you think. Please include a link to your Mirror Image Stamped creations. Thanks!
Colossians 3:16-17 ~ "Let the message about Christ, in all it's richness, fill your lives. Teach and counsel each other with all the wisdom He gives. Sing psalms and hymns and spiritual songs to God with thankful hearts. And whatever you do or say, do it as a representative of the Lord Jesus, giving thanks through Him to God the Father. "
blessings,
nancy


