Here's the card:
Custom Paper Tutorial Using Microsoft Publisher
Click on the photos to view them larger for detail.
I scanned the stamped sheet into my computer and opened the file in Microsoft Publisher.
Copy and paste the image several times and then crop around each stamped image.
While cropping the images use the set transparent background tool on the picture tool bar, it's the second tool from the right, this makes it easier to line up the images because it removes the white background from the original paper.
Once the images are cropped arrange them in a line and align them so they are straight using the Arrange tool as shown on the screen below. You will use- align middle because the images are different heights. Then group these images.
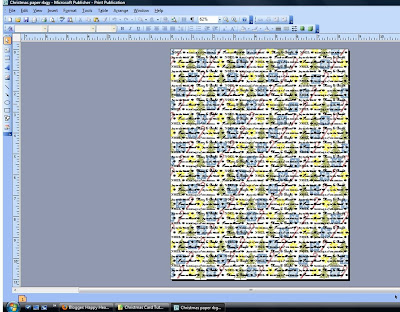
Once grouped, copy and paste twice and using the Arrange tool to align the 3 grouped images. Now you will reduce the images to the desired size. Now just keep copying and pasting and grouping until the sheet is filled. You will want to stagger the rows to create a diagonal pattern or leave them straight to create stripes.
You can clean up the edges by ungrouping and deleting the images that fall off the sides. (You'll notice I did not set transparent background here and it made this part much more difficult; trial and error)

When I filled my page I opted to add text over the top using the text tool from the drawing toolbar on the left side. Just layer it over the top.
Final design before printing....

And here is the paper ready to use on my card....if you would like, you may click on the photo below to save and use this paper for your own projects. Since I used Hero Arts Stamps please don't use the paper for anything commercial. Thanks.
Let me know if this is helpful...there's a good chance I'm the only "dinosaur" still using software other than Photoshop. (I have Photoshop, I just can't remember how to use it.)
Thought for the Day: From Philippians 4:8 Fix your thoughts on what is true, and honorable, and right, and pure, and lovely, and admirable. Think about things that are excellent and worthy of praise!
Blessings to you!


what a clever idea and such a lovely card as a result of your customer paper! Thanks for the tutorial!
ReplyDeleteMeant to say custom paper! :)
ReplyDeleteHow cool, Nancy! Love your tutorial and it's a big help to me because I don't own Photoshop, either! I like using Word and playing around with digi images. Great tutorial--thank you!!
ReplyDeleteThis is sooo lovely Nancy, very intricate! How wonderful you shared how to customize the print on the paper! BTW, where do you teach?? I know we never got together this summer! Sigh...totally my fault - my summer was awful, so I will have to make it up to you!
ReplyDeleteSuper card!! Thanks for the awesome tutorial! Love your custom paper!
ReplyDeleteHugs,
Vanessa
Love your card Nancy. Thank you so much for the wonderful tutorial on how you created your custom paper! I have never tried anything like that but must give it a go. I'll have to come back later for a proper look at your blog! Thanks again.
ReplyDeleteThis is fantastic - I can imagine you spent a lot of time on this card but it came out so very beautiful!
ReplyDeleteSanne
Wow! Love your paper- great tutorial! Thanks for taking the time to show us all how you did that!
ReplyDeleteBrilliant! Thanks for sharing this, Nancy!
ReplyDeleteBeautiful verse!!
ReplyDeleteThe gingham bow on your card is super - to me this is a real American holiday card!